Serum is probably the most popular VST synth of our time. It sounds great, looks stunning, is easy to understand, plus there are plenty of Serum presets and skins available. Since not everyone knows how to install Serum presets I decided to write this tutorial for you.
Fortunately, it doesn’t matter if you’re using Mac or Windows, Ableton or FL Studio. The process is always the same!
Open Serum’s Presets Folder
Start by opening Serum.
Now go to the menu in the top right corner and click “Show Serum Presets folder”.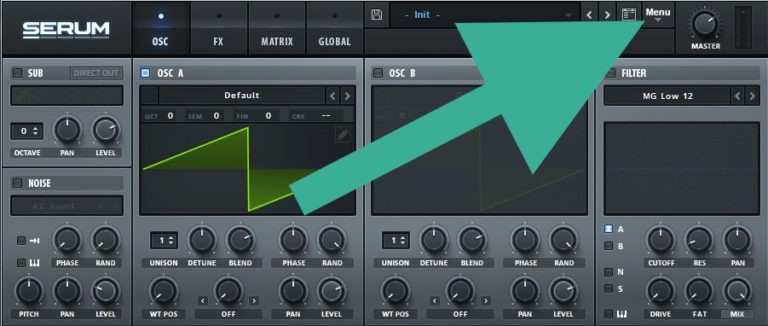
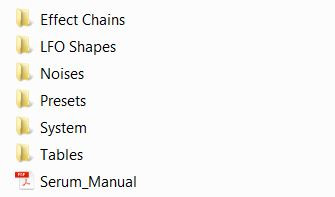
You should see these folders (this screenshot is a bit old by now, so you should see some additional ones):
If you can NOT find Serum’s preset folder there’s a good chance you haven’t installed a legit license, so make sure to purchase one. It’s worth it 100%, this is a great synth and Steve Duda is great developer!
Paste Your New Presets
Now paste the pack you’d like to install in the presets folder. Some preset banks may come with additional LFO shapes, noises, wavetables or skins. Just drag each of those categories in the matching folder, too. Wavetables go to “Tables”, noises go into “Noises” and so on.
Overwrite, if needed. We recommend to backup your libraries before adding new presets, is not needed but, just in case.
Have fun using Serum Presets!
Go ahead and open Serum. You’ll find all patches in Serum’s browser. If you can’t open some of the presets you probably haven’t installed the latest update yet.
..and this is how to install Serum presets!
About Synth Presets:
Synthesizer presets are pre-programmed settings for a synthesizer, or virtual instrument, that can be easily recalled and used as a starting point for creating new sounds. These presets are created by sound designers or other users and typically include settings for parameters such as oscillator waveforms, filter cutoff and resonance, envelope settings, and other modulation options.
The presets can be used to create a wide range of sounds, from traditional synth sounds like basses, leads, and pads, to more unique and experimental sounds. Many synthesizers come with a built-in library of presets, and many more can be found online and can be downloaded and imported into the synthesizer.
Presets can be a great starting point for users who are new to synthesizers, or those who are looking for inspiration for their music productions. They can also be used as a way to quickly and easily add new sounds to a track without having to spend a lot of time programming the synthesizer from scratch.
About Serum:
Xfer Serum is a wavetable synthesizer software developed by Xfer Records. It is a virtual instrument used for creating and manipulating sound in electronic music production.
Serum uses wavetable synthesis, which allows for the creation of complex and evolving sounds using wavetables, which are essentially sound samples that can be manipulated in various ways. The software features a user-friendly interface, powerful sound design capabilities, and a large collection of presets and wavetables, making it a popular choice among electronic music producers.
Serum also includes a range of effects, including distortion, reverb, delay, and filtering, as well as advanced modulation options, making it possible to create a wide range of sounds, from classic synth sounds to cutting-edge experimental sounds.
Serum is compatible with both Windows and Mac operating systems and is widely used in a variety of electronic music genres, including EDM, trap, techno, and many others.